When you watch a seasoned technician replace a windshield, the work looks fluid, almost effortless. That ease comes from precise technique, yes, but it also comes from the right tools, maintained rigorously and used with judgement. Professional Auto Glass Replacement is an orchestration of chemistry, physics, and fine motor control. Get a single step wrong and you can invite leaks, wind noise, stress cracks, or compromised crash performance. Get it right and the glass disappears into the vehicle the way the factory intended, restoring strength and clarity.
I have spent years around glass bays where you can hear the small decisions in the soundtrack: the soft rasp of a cold knife through urethane, the click as a molding seats, the low hum of a vacuum setting tool drawing the pane into perfect position. Below is a tour of the gear that makes that precision possible, and why it matters.
Why tools define the outcome
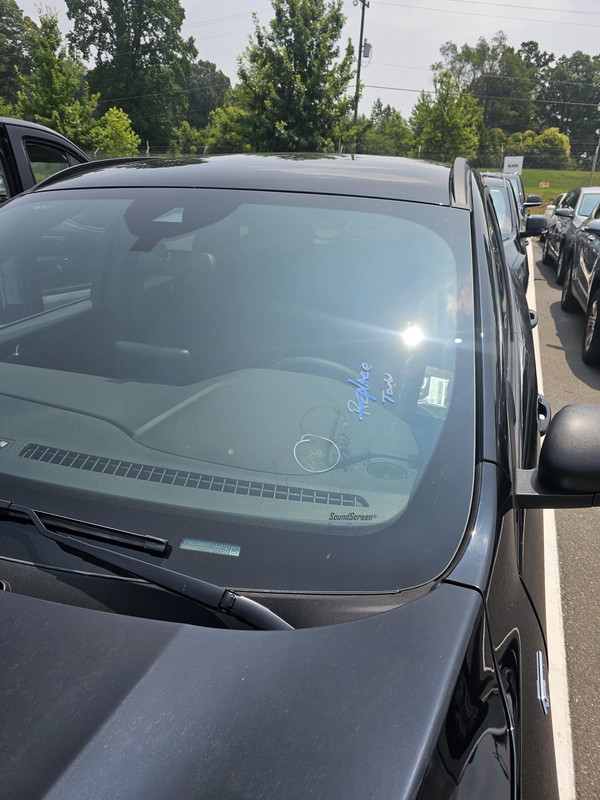
Modern vehicles use bonded glass as a structural component. The windshield ties into the A-pillars and roof, and in many models helps with airbag deployment timing. A windshield that looks fine but is set a couple millimeters high on one side, or bonded with urethane that skinned before contact, can put passengers at risk. People often think of Windshield Repair as a cosmetic fix and Windshield Replacement as swapping a pane. It is closer to aerospace bonding than home window work. The tools exist to control three things: cut, clean, and cure. Each has pitfalls, and each rewards care.
Glass removal: cutting the bond without cutting corners
Removing the old glass is one of the more technical parts of the job because the urethane bead can hide sensors, wiring, and paint that must remain intact. Shops reach for different weapons depending on the car, the urethane type, and where the glass failed.
Cold knives are the classic. Picture a T-handle attached to a thin, rigid blade with a hook profile. The tech inserts the blade between glass and body, then pulls the handle while steering the blade along the urethane. It is slow and tactile, which helps near fragile ceramic frits or when the body flange is thin. A properly sharpened cold knife can glide; a dull one will chatter, and chatter can chip the glass edge or gouge paint. I have seen techs stop and strop the blade twice on a single old BMW windshield where the urethane felt like dried granite. That patience saves a repaint.
Wire systems are the other standard. You feed a braided or monofilament cutting line through the urethane using small access holes or specialized feeder tools, then draw the line in a sawing motion from inside to out. The best wires distribute pressure and stay cool, reducing the risk of delaminating the windshield’s inner layer when it is reused, such as in a back glass trim rescue. On modern windshields with camera housings and sensors near the glass edge, wire cutting can be safer, since you can control the cut plane to avoid embedded brackets. The trick is managing anchor points and using low-friction guide pulleys so you do not saw into the dashboard pad or the headliner near the corners.
Powered reciprocating tools, sometimes nicknamed “power cold knives,” use oscillation to help the blade pass through stubborn urethane. They speed the work, especially on trucks and SUVs with high-torque beads or during winter when urethane stiffens. The catch is heat and control. A power tool in the hands of a rushed tech can cook paint on the pinch weld or dig into it. The better shops keep heat in check with spray lubricants and short duty cycles, swapping to manual cutting near sensor pods and brittle moldings.
Then there are corner tools and specialty blades. The urethane at lower corners often sits in a pocket where the cowl panel meets the A-pillar, with little clearance. Offset blades, 90-degree hooks, and low-profile scrapers exist for that exact geometry. Those little choices turn a 20-minute wrestling match into a clean ten-minute cut.
Handling and lifting: moving a sheet of safety glass like it weighs nothing
A windshield feels insubstantial and heavy at the same time. You are holding a large, flexible rectangle with a lip that wants to knock into wiper studs and mirror brackets. Your fingerprints can ruin the primer area. And in a shop that cares about fit quality, a two-millimeter misalignment is too much.
Vacuum suction cups are the first line. Not the hardware-store variety, but automotive-grade cups with gauges that hold a vacuum and tell you if the seal is good. The cups mount to the glass where the load can distribute evenly. Every tech I respect tests each cup with three quick pumps and a pause to watch the gauge; a slow bleed means swap it. If you have ever watched a cup let go mid-set, you do not forget it.
For large windshields, panoramic roofs, and heavy laminated back glass, lifting frames are a luxury that becomes a necessity. These frames carry multiple cups connected to a single pump and sometimes a wand handle that lets you fine-tune pitch and yaw. You can float the glass into place instead of muscling it. On vehicles with delicate piano-black A-pillar appliques, that finesse avoids scuffs that otherwise ruin the day. In high-end shops, you also see overhead or mobile assist arms that hold the glass at the correct height while the installer checks bead contact. It is slower only on paper. In the real world, these tools reduce resets and rework.
Edge protectors and shipping cradles matter too, though they rarely get attention. When a box lands at the shop, a tech inspects deformation along the glass edge. Setting a windshield with a nicked PVB interlayer near the frit is asking for a stress crack after installation. Good cradles and foam pads prevent micro-damage while you prep the bead. That quiet prep work saves returns.
Surface prep: make the bond, not a mess
Prep is where many Windshield Replacment failures begin. You cannot bond to dust, oil, or oxidized urethane. You also cannot flood the channel with solvents that soften paint. The goal is a chemically active surface that is clean, dry, and properly primed.
Pinch weld scrapers are not glamorous, yet they drive long-term success. The common approach is to “short cut” the old urethane, which means leaving a thin, uniform layer of the original bead on the pinch weld. Two to three millimeters is a common target. That layer serves as a compatible substrate for the new adhesive. The scraper needs a sharp, straight edge and just enough flex to keep that uniform height without biting into paint. Try to clear back to bare metal and you invite corrosion. If you do nick paint, out comes the OE-approved primer and sometimes a two-part touch-up to seal the steel before adhesive.
Solvent systems matter. Most shops use a dedicated glass cleaner without ammonia to remove fingerprints and dust, followed by a specialized glass activator or cleaner from the adhesive manufacturer. A small lint-free wipe pulled in one direction avoids fibers and streaks. If someone reaches for household glass cleaner on a primed area, a senior tech will usually tap their hand away. Ammonia and silicone leave residues that sabotage adhesion.
Primers and activators are chemistry, not ritual. Urethane systems fall into categories: some require a black primer on the frit and the old urethane bead, others use a clear activator with no black-out unless bare metal is exposed. The data sheet rules. On hot, dry days a primer can flash in under a minute; in winter it might need five to ten. The right brush matters too. Dauber caps that shed can leave bristles in the bond line, creating leak channels. The good installers keep a small stash of high-quality applicators.
Adhesives and applicators: the heart of the bond
Not all urethane is equal. The term covers a range of moisture-curing elastomeric adhesives with different viscosities, green strengths, and safe drive-away times. Choosing correctly is about the vehicle, safety requirements, and climate.
High-modulus, non-conductive urethanes are now common because of sensor islands, heated windshields, and embedded antennas. Non-conductive matters for modern glass; use the wrong product and you can interfere with radio or defroster performance. Service manuals sometimes require a specific modulus to match the body’s stiffness. If you bond a windshield with a soft low-modulus adhesive in a body engineered for high stiffness, you may get flutter at speed and fatiguing noise over time. The opposite can transmit more vibration. The middle ground works for most passenger cars, but high-roof vans and off-road trucks benefit from higher green strength that resists movement before full cure.
Applicators have evolved. Manual caulking guns still work and are popular in mobile Windshield Replacement, but battery-powered guns with adjustable thrust give better control for consistent bead size. The bead height is not a guess. You match it to the gap between the glass and pinch weld. Too tall and you will smother sensors; too short and you will get gaps that allow rattles or leaks. Many pros run a simple gauge pass with a plastic spacer before applying urethane, or they mark the glass back side with a grease pencil to guide the bead. Bead profile matters too. A triangular bead, not a flattened ribbon, helps the adhesive wet out under compression without trapping air.
Temperature and humidity control the cure. Most urethanes specify a safe drive-away time between 30 minutes and 4 hours in standard conditions, usually around 21 to 24 degrees Celsius and relative humidity of 50 percent. In winter, with the heater running and dry air, cure slows. Some products are formulated for cold weather, with accelerators that keep safe drive times reasonable. I keep a humidity meter in the bay and a small log on the bench. If the data sheet says 60 minutes at 50 percent humidity, and the shop is at 20 percent, I do not make promises I cannot honor.
Calibration and electronic companions: the new normal
Auto Glass is now a platform for cameras, radar heaters, and rain or light sensors. After the glass is replaced, the systems may require calibration. This has changed the toolset.
ADAS calibration rigs include targets, stands, and software integrated with scan tools. Some vehicles accept dynamic calibration, which takes place during a test drive at specific speeds and conditions. Others demand static calibration with precisely placed targets at set distances and heights. The measuring gear looks like survey equipment because the tolerance can be tight, sometimes within millimeters. Shop floors need marked zones to ensure targets are square to the vehicle. A digital angle gauge, laser levels, and measuring tapes that do not stretch become part of glass work. Skipping calibration or guessing can lead to lane-keep or braking systems that misjudge distance. That is not an accessory; it is safety-critical.
Sensor gel pads and adhesives for rain and humidity sensors are another micro-tool category. Remove the old gel too aggressively and you scratch the sensor face; set the new pad with a bubble and the wipers may run erratically. Heat the pad gently, press from center outward, and keep your thumbs off the optical surface. A small detail, and one that avoids a return visit where the driver says the automatic wipers act haunted.
Heated windshields and antenna connectors need low-resistance electrical joints. A decent multimeter validates continuity before you hand back the keys. A quick check of the defroster grid for uniform heating can save embarrassment when the first frost hits.
Trims, moldings, and what holds the look together
A great bond can be undone by poor trim work. Moldings, clips, and cowls anchor the visual finish and serve as water management. With automakers pushing sleek A-pillar lines and flush glass, the tolerances got small.
Clip tools and panel levers avoid breakage. Cheap pry bars chew soft plastics; the good nylon or POM levers preserve finish. On older cars, clips often become brittle. Stocking extra OE or OE-quality clips is a small luxury that keeps things tight and rattle-free. Universal clips rarely hold as consistently as the real parts.
Preformed moldings, often with taped backs, must sit on clean, primed glass and body. You can set them slightly warm to help adhesion, especially in cooler shops. Rolling pressure uniformly along the length with a soft roller rather Spartanburg auto glass shop than thumb presses reduces waves. I have seen techs use a simple foam paint roller for this task with great results.
Cowl panels come off and on more than owners realize. Missing or misaligned cowl fasteners let water migrate into the cabin filter or blower motor. A quick inspection and a dab of dielectric grease on the washer hose joints is good form. It is the sort of small maintenance that a meticulous shop adds as a courtesy.
Safety gear that protects people and vehicles
This trade carries sharp edges, solvents, and heavy panes. The right safety tools prevent injuries and preserve the car.
Cut-resistant gloves with good feel make a difference when handling glass and wire. Nitrile gloves over thin cut-resistant liners are common because urethane and primers stick to skin. Eye protection is non-negotiable when using power tools and wire. For breathing comfort, especially in enclosed spaces, a half-face respirator with organic vapor cartridges takes the edge off primer fumes.
For the vehicle, paint protection mats, fender covers, and dash blankets are simple and luxurious touches. The best shops layer soft microfiber on the dash where the glass will pass, and add a body shop-grade tape along A-pillars to protect from incidental contact. It signals care and prevents a day-ending scratch.
Measurement and alignment: the quiet tools
Most of the time, if the bead height matches and the glass is square to the opening, everything lands where it should. But the best outcomes come from measuring.
Gap gauges, sometimes as simple as plastic feelers, verify the reveal around the perimeter. A uniform reveal not only looks right but keeps wind noise predictable. A small laser level or chalk line helps set alignment to the roof and hood lines when factory locator pins are missing or the old glass was mis-set.
One subtle tool is the dry-fit template you make from a piece of string or tape tracing the old glass position relative to body reference points. Before you cut out the old windshield, mark the top center on the headliner or roof tape, the left and right reveals, and the mirror bracket alignment. Those marks make the new set quicker and more accurate, especially on vehicles where the new glass has slightly different frit width.
Environmental controls: the invisible helpers
Glass work is sensitive to climate. Adhesives cure faster in humidity and warmth. Primers flash differently by temperature. Glass expands and contracts with heat.
A climate-controlled bay is ideal. Short of that, portable heaters, dehumidifiers, and fans create a stable microclimate near the vehicle. The aim is not to rush the cure with heat guns blasting directly on a fresh bead. It is to keep the entire bond line within the recommended range. I once watched a mobile team set glass in a mountain town at minus 5 Celsius, using a pop-up tent, two safe electric heaters, and warm packs on the urethane tubes. They prewarmed the glass inside the van and timed the primer flash precisely. The job took longer, but the bead met its spec and the drive-away guidance remained honest.
UV exposure matters too. Some adhesives do not like direct prolonged sunlight during open time. Covering the bead if you must pause is a small habit that protects the chemistry. A simple light-blocking sheet or a piece of cardboard does the trick.
Mobile versus shop work: adapting the tool kit
There is elegance in a well-equipped van that handles Windshield Replacement on a driveway without compromise. The mobile kit leans toward versatility and portability. Battery-powered guns, compact wire systems, collapsible glass stands, and a limited but curated selection of primers and clips. Energy management becomes a tool itself. Keeping urethane warm in winter with insulated sleeves, protecting primers from overheating in summer, and securing glass from wind gusts are the details that separate hurried from professional.
In a shop, you can afford heavier gear like lift-assist arms, floor-mounted calibration rigs, and fixed-height glass racks. You can also stage jobs to allow proper cure times, then confirm with moisture and temperature logs. The point is not that one is better. It is that the tool choices adapt. The best mobile techs over-index on preparation and redundancy: a second suction cup, an extra wire spool, a spare battery, a small tarp if weather turns.
When repair, not replacement, is the smart move
Windshield Repair is a different discipline with its own tools, and a mark of integrity is recommending it when appropriate. A small star break away from the driver’s primary viewing area, caught early, can be stabilized and made nearly invisible. The tools include resin injectors, UV curing lamps, and fine drill bits to stop a crack from running. The resin viscosity is matched to the damage: thinner resins wick deeper into tight cracks, thicker resins fill small pits.
A good repair kit uses bridges that sit flat without scratching and vacuum-cycles the resin rather than just pushing it in. The best results happen when the glass is dry and slightly warm. A heat lamp or a gentle warm-up with a defroster helps. The aim is to restore structural continuity and arrest crack growth, not to make the blemish vanish completely. If a crack reaches the edge, sits in the driver’s critical vision, or exceeds a length recommended by regulation or best practice, replacement is the safer call. The ability to make that call, with tools for both paths ready, builds trust.
Troubleshooting and the saves that keep cars dry and quiet
Even with flawless technique, some vehicles present quirks. The original urethane path on a particular model may leave a gap near the lower corners. If you have ever chased a faint drip that only appears during a pressure wash, you know the value of diagnostic tools.
Smoke machines designed for leak detection push low-pressure smoke around the glass perimeter while you watch the interior for wisps. A less glamorous but effective method is a helper with a hose and a patience for slow, deliberate passes while you sit inside with a bright flashlight. If you see moisture, you note position, then pull the trim back and test with capillary gel sealants designed for glass edges. The right sealant is not a substitute for proper bonding, but it can fill a micro-channel under a molding without disassembling the entire installation.
For wind noise, a decibel meter on a test loop improves objectivity. A narrow hissing that starts at 50 mph and grows with speed often points to a reveal mismatch or a molding not fully seated. A little talc on the molding can reveal rubbing points by leaving tracks. Reading those small signs is as much a tool as any blade in the drawer.
Care, maintenance, and the economics of tools
Top-tier tools pay for themselves by avoiding rework and liability. They also demand maintenance. Suction cups need their pads cleaned with mild soap, stored flat, and retired when micro-cracks appear. Wire cutters dull and should be swapped before they fray the line. Urethane guns need to be cleaned and lightly lubricated so plungers do not stick, which would cause bead inconsistency. Primers have shelf lives; writing the open date on each bottle is a simple discipline that prevents a bad bond from an expired chemistry.
There is a temptation to standardize on a single adhesive system to streamline training and inventory. That works until you encounter a vehicle with a specific requirement. Keeping two or three options, each with clear labeling for modulus, conductivity, and drive-away time, is a better compromise. The extras occupy shelf space but reduce corner-cutting.
The quiet luxury of a proper finish
There is luxury in a windshield that fits so perfectly you forget it exists. The wipers sweep without chatter. The rain sensor reads correctly. The ADAS cameras see the world as designed. The molding line flows with the body. No whistling at highway speed, no drips after a storm, no residual primer smudges hiding at the edges. Owners rarely realize how many tools and choices made that outcome possible. That is fine. The satisfaction for the craftsperson is in that silence.
For customers weighing Auto Glass Replacement, asking a shop about tools is not nitpicking. It is a fair proxy for quality. Do they use calibrated suction cups with gauges? Are they equipped to calibrate ADAS systems or coordinate with a trusted calibration partner? What urethane system do they use, and how do they verify cure time before releasing the car? These questions signal respect for the process.
And for those of us inside the trade, the tools are not trophies. They are extensions of the hands and the judgement. A sharp cold knife, a steady vacuum cup, a well-chosen urethane, a calibrated target board. Put together, they turn a difficult job into a reliable one, and a service into an experience that feels, in the best sense, invisible.